Organization
Use Organization to setup and customize your practice in Dr. Know.
Tools under Organization:
- Alliances:
- Create and manage alliances. Alliances provide a way to group core objects together. Only users belonging to an alliance will see its objects. Users belonging to more than one alliance must choose an alliance at the start of each session.
- Partners:
- Create and manage partners. Partners are affiliates of your organization with whom you wish to share resources. For example, a partnership can offer filtered access to a referring provider's patient records through the Dr. Know Go online experience.
- Sites:
- Create and manage sites. Sites are locations where providers see patients.
- Visit Types:
- Create and manage visit types. Visit types are the reasons for an appointment.
- Teams:
- Organize users within your organization into teams. Teams offers powerful communication and workflow scenarios, accessible from both the main Dr. Know product as well as its mobile companion experience. Optionally, extend these capabilities to both your external partners and even to your patients. Dr. Know services can also take advantage of Teams to notify you when important events occur.
- Devices:
- Create and manage devices. Devices can be associated with non-physician based visit types and have their own schedules.
- Patients:
- Manage patients. This also supports related recovery tools.
- Providers:
- Create and manage providers.
- Providers - Internal:
- Create and manage internal providers.
- Rotations:
- Create and manage provider rotations. Rotations define the normal scheduling behavior for providers. Rotations support both simple and complex scenarios where providers travel to multiple sites, even within the same day.
- Rotations - Current:
- View current provider rotation.
- Calendars:
- Create and manage calendar events for both users and providers. Provider events are honored by scheduling algorithms when suggesting available appointment times. An organization-wide shared calendar is also supported via configuration.
- Document Types:
- Create and manage unstructured document types. Add custom group names for enhanced chart organization. Associate custom apps to enhance unstructured documents with structured data elements.
- Metric Reports:
- Run business and practice management reports.
- Drugs:
- Create and manage your local drug catalog. Drug searches within the main product include both this catalog as well as an online catalog when search results cannot be found.
- Insurance:
- Create and manage insurance companies.
- Labs:
- Create and manage labs.
- Lab Panels:
- Create and manage lab panels. Lab panels are groups of related labs.
- Orders:
- Create and manage provider orders.
- Order Sets:
- Create and manage provider order sets. Order sets are groups of related orders.
- Order Categories:
- Create and manage order category mappings. These mappings provide a way to assign a generic category to one or more specific orders. Categories are useful for insights and analytics.
Select the tool in Blade 2 and click the Run button to access the tool.
Non-Blade Tools:
Rotations:
To create a rotation, click on the + sign in the top left, (after selecting your alliance for the rotation).
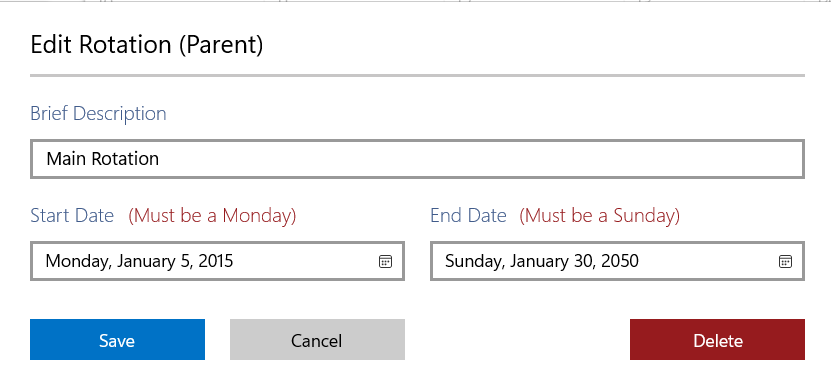
This screen will come up and allow you to create a start and stop for the rotation. You may name it anything you would like, but we recommend using something that will be easy to remember or describes what you are trying to set up.

Click save to submit it to the next step.
If you need to edit an existing rotation, you can do that by selecting a rotation and clicking on the pencil icon instead of the + icon.
Next, you need to select your provider in that rotation.
Do this by clicking on the 'Provider' drop-down box.

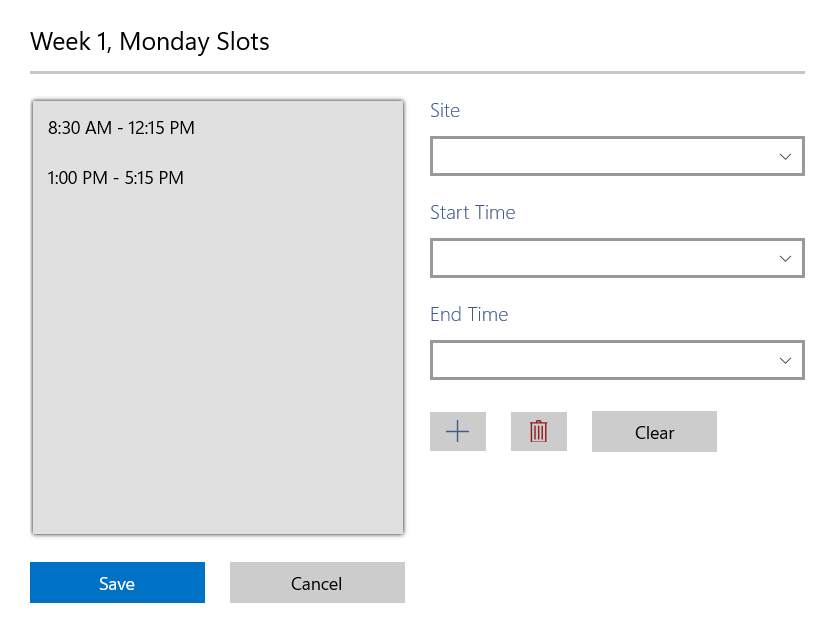
For each day of the week you can then click on the box in the Week 1 row and assign a rotation. That screen looks like this:

As you can see, it allows you to select a site (if you have multiple set up), and the times that the physician is available at that location.
This is done for each day in that week. If the rotation changes from week to week, you can click the + sign next to the 'Provider' drop-down to add a new week. The system will assign the pattern you set up based on the start and stop dates and rotation you provided. This will be applied to the scheduling system to ensure accurate physician availability at that location.
This should be done for each physician.
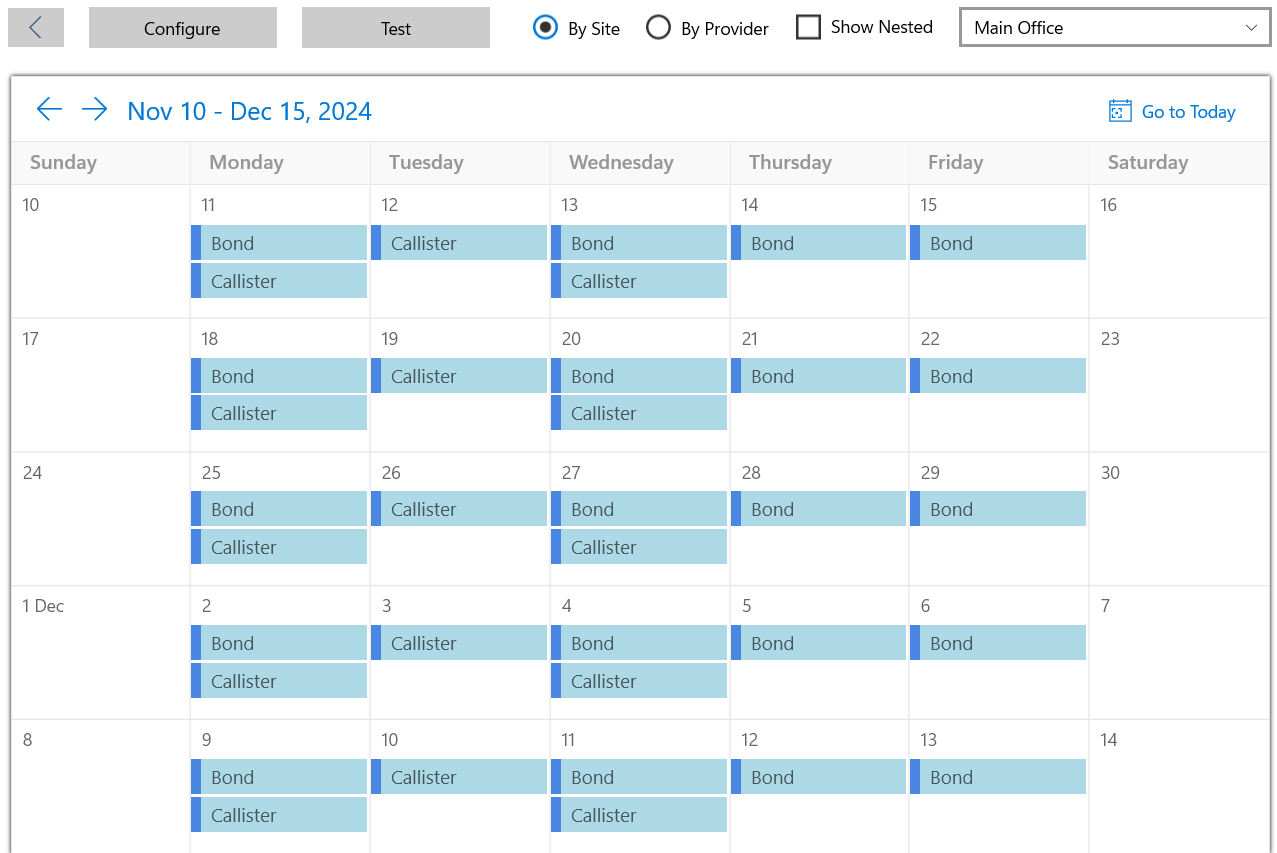
To see how your rotation shows up on the calendar, press the Test button in the top (middle) portion of the screen.
You will have the option to see the rotation schedule by site, provider, or nested view.
For example, if you select by site and then click the drop-down arrow on the right to select the site you want to view, it will provide a calendar view of the rotation, (see below).
If your rotation looks off, you can click the Configure button to go back and make changes until the schedule looks correct.

